Hi folks :) I went to bookstore for my Dengki Hobby and stumbled upon this Model Kit World magazine that comes together with a HG 1/144 Anti-MS Bazooka for Sinanju and managed to grab a few @ RM10 per piece ;)
This kit was recently reissued by Bandai and I observed that many are going for this, and the Zeta Plus A1, due to it low price but complaining the kit is not living up to their expectation... I means, this kit is based on Zeta version 1.0 and was manufactured in year 2002 so you guys should know what to expect ;)
Manufacturer: Model Kit World (HK)
Scale: 1/144
Grade: HG
Origin: UC0096 Unicorn
Price: RM10, with magazine
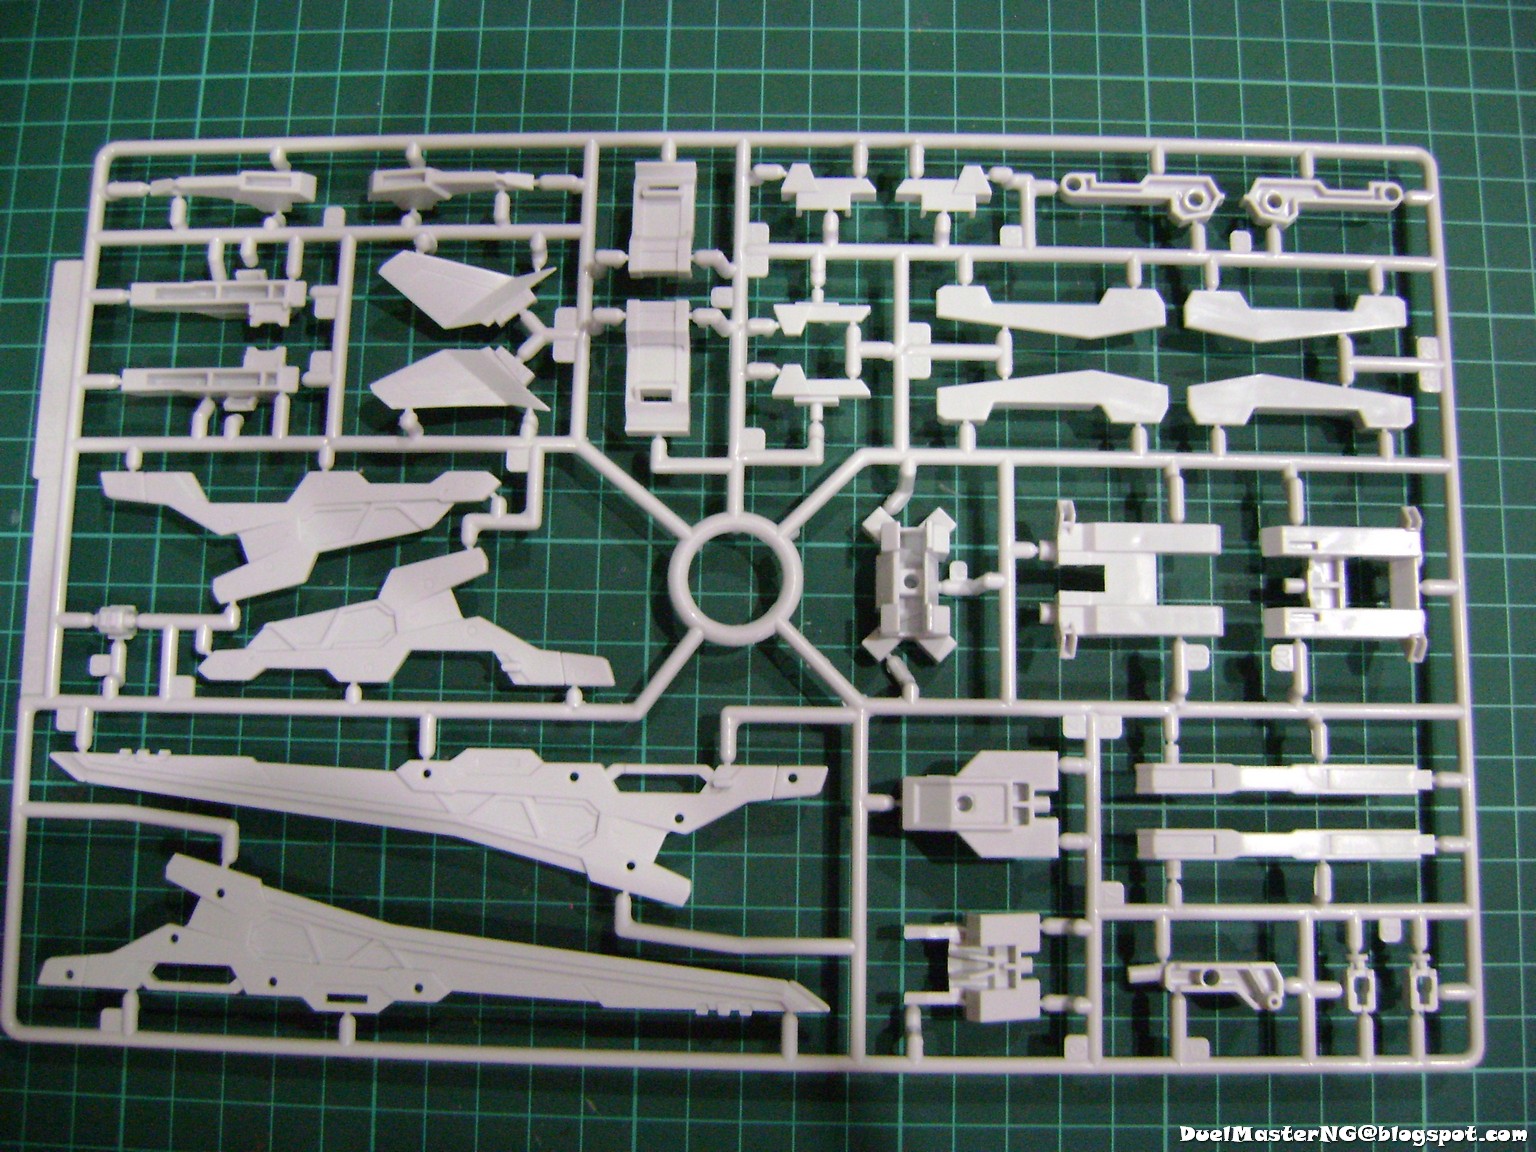
Section 1: Magazine & Runner
Well, there is only 1 runner as you can see :P I wouldn't expect very good quality since I am only paying RM10 for this bazooka with the magazine but the quality is pretty good in my opinion, just that we have got to do our own coloring if we want it to be really nice ;)
The magazine is in Chinese as this is a Hong Kong published magazine :P


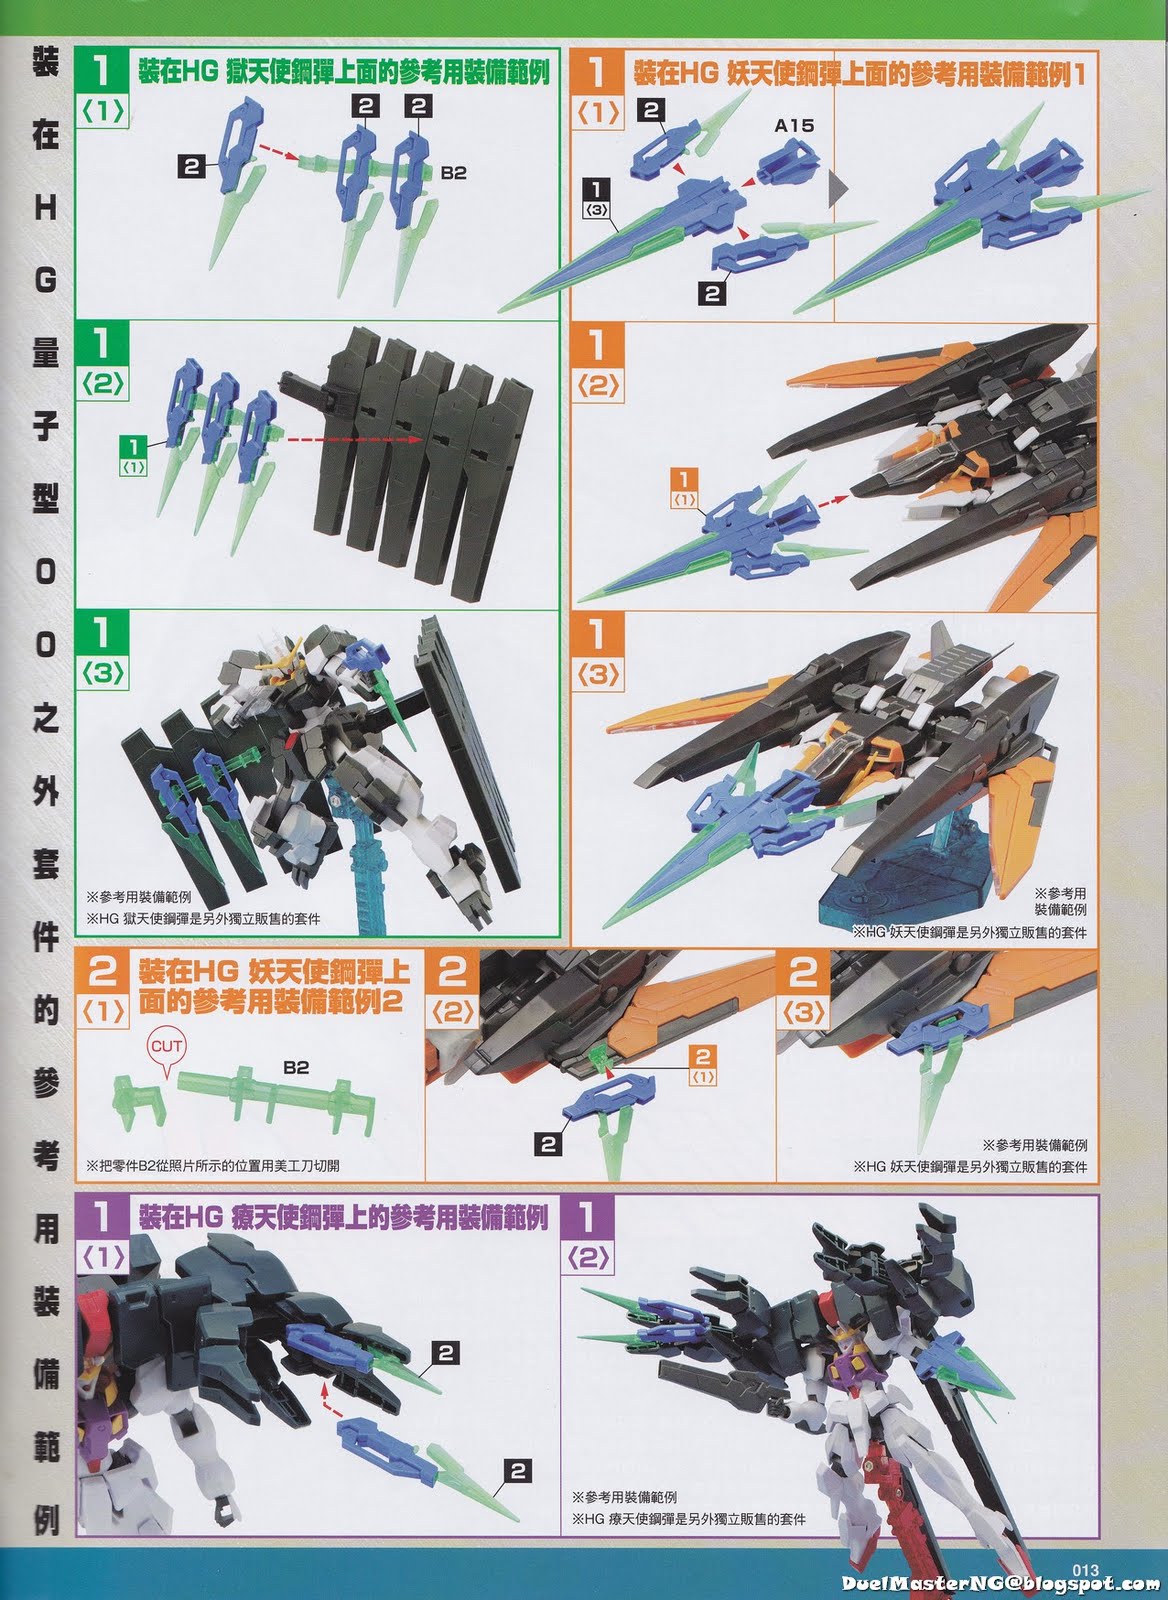
Section 2: Step-by-step Guide
Why would I create this step-by-step guide? I started assembling this kit and found that there are some mistake in the in-magazine instruction manual so as a fan service, I do my own version of step-by-step here ;)
Part A: The Main Body
The main body of the bazooka consists of the magazine (ammo) and the loading/unloading mechanism. In the MG version, the magazine (ammo) could be loaded/unloaded with the mechanism at the back, and the instruction manual illustrated so, but in the actual fact, the loading/unloading is not possible with this 1/144 version unless you modify it slightly...
Firstly, we assemble the ammo pack with 14, 23 and 7... at first, I have a question in my head why there are some holes in the middle of the ammo pack; let's revisit this later :P


Then we attach 6 onto the ammo pack; 6 is actually the loading/unloading mechanism when it supposed to lock the ammo pack to prevent it from falling off...


Then we put the ammo pack into the main body of the bazooka form by 17 and 18... did you see the 2 pegs at where the ammo pack should be going? These pegs actually went through the holes in the middle of the ammo pack, so it actually fixing the ammo pack rather than allowing the loading/unloading to happen!
Well, this would be an easy fix by removing the pegs and glue 17 & 18 together with cement or superglue ;)


This concluded part A ;)

Part B: The Launch Tube
The launch tube is expendable in the MG version, and the same in this HG version :) Firstly, insert 1 into part A.


Then we lock the tube inserting 3 along the tube and lock it with part A. You might want to consider gluing this parts ;)


Next, we insert 8, 10 and 5 along the tube and form the front of the launch tube... you might want to consider gluing 8 and 5 too ;)


Then we attach the handle, 13 and 16. The 13 with further locking 3 with part A.


Lastly, attach the hanger, 20, to the front of the launch tube and we have completed Part B ;)


Part C: The Stabilizer
I actually don't know what this is called, but it looks like some counter weight and the bazooka so I just call it the Stabilizer :P Nothing much to talk about here except the manual is mixing up some of the numbering so do refer to my numbering carefully ;)


Part D: The Sensor
Straight-forward... no explanation needed :P


Completing the Bazooka ;)
Firstly, attache part D to part C. Gluing could be considered here :)


Then we attach part C+D onto part A+B. Do not glue this section as part C+D would need to be removed for the transformation ;)


The Bazooka ;)
Here's the finished product. Looks pretty nice tho. I have not fix up my HGUC Sinanju so I would be able to demonstrate the other forms (attaching to the shield, beam rifle & gattling gun) of attachment of this bazooka so you would have to explore it yourself ;)

Quick Review
Plastic Quality and Detailing
Pretty good for something comes with this low price ;) The ammo loading/unloading mechanism is omitted but could be brought back with very little effort so generally I would rate this GOOD ;)
Looks and Feels
Fantastic addition to HGUC Sinanju of 1/144 scale, and it won't bleed your wallet :) This can also be used by other 1/144 so you might want to grab a few units when you have the chance ;)
Fin ;)