Hi guys :) how's things? Hope all are good ;)
Since I have done ReZEL and Sinanju previously, Delta Plus would be definitely the next in line ;) Now only left Unicorn Gundam... maybe I'll do the TT Hongli one next :p
Manufacturer: Bandai
Scale: 1/100
Grade: MG
Origin: UC0096 Gundam Unicond
Price: 4500 Yen
Part 1: Runners
The amount of runners are pretty little... assemble is not really an issue but I won't say that for the transformation :p


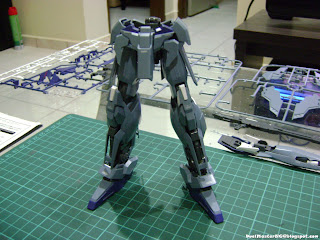
Part 2: Legs
The legs are pretty well articulated. I just wish that Bandai don't use ball-joint for the hip...


Part 3: Torso
This torso feels exactly like Zeta v2.0 :) All skirt armors are moveable so it would not hinder the posing of the legs ;)
Part 4: Lower Body
As usual, I do my bottoms-up build and now the lower body is completed ;) This kit is pretty nice so far, just that you need to handle the parts with a little more care as there are quite some thin parts which you might break during trimming of nub marks and sanding.
As you might have observed, I used Gundam Marker Gold on the fuel pipes at the back of the leg ;)
Part 5: Arms
Great articulation as seen in the picture ;)
Part 6: Head & Upperbody
I was too exited and completely forgotten to take pictures of the head and upperbody :P Anyway, the body also feels exactly like Zeta v2.0 (they are essentially the same frame with different outer armors).
Part 7: Completed Delta Plus
Pretty quick build I have here for the Delta Plus :) Although it is gray in color, Bandai actually uses a blueish gray so it won't conflict with the gray-colored Zeta plus and the FAZZ ;)
I came across other reviews saying that this kit cannot stand... that is absolute exaggeration! Granted the feet mechanic is a bit loose due to the transformation mechanism but this kit would still stand and pose, just need to find the right point of balance :)
Part 8: Mobile Suit Mode
Sniping Pose
As you can see, kneeling pose is not an issue, and Delta Plus is doing it with style ;)
Side-by-side with Hyaku Shiki HD Color
I'm rooting for Hyaku Shiki v2.0 ;)
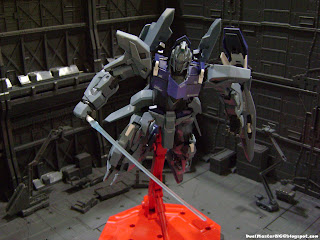
Flying Pose
Well, this is what Delta Plus is meant for ;)
Part 9: Waverider Mode
Surprisingly, this kit is big after transformation to waverider mode ;) The transformation mechanism is pretty solid (same as Zeta v2.0) but it takes some patience to do it successfully... I ended up taking the arms apart from the body to ease the transformation on my 1st attempt :P
I felt real good after a successful transformation, and here are some pictures ;)
Side-by-Side with Zeta v2.0 HD Color


Quick Review
Plastic quality
No complain for a Bandai kit :) Just need to be careful on the handling as there are some thin parts that are easily broken.
Articulations
For a transformable kit, the articulations are exceptionally good! This is the result of years of continuous improvement of Bandai.
- Head/Neck: Normal
- Shoulder: Fantastic! Very highly pose-able with the pull-out mechanism.
- Arm/Elbow: Excellent!
- Wrist: Normal+.
- Hand: Normal+.
- Waist: Normal.
- Skirt Armour: Excellent! It won't get in the way even with some challenging pose ;)
- Hip/Tight: Normal+... just wish that Bandai would use the same joint system like the 00 and Sinanju!
- Knee: Excellent!
- Ankle: Very good ;)
Looks and Feels
This is a very nice kit indeed. Get this if you have additional cash to spare or are looking at collecting all UC 0096 MG. Otherwise, I would recommend Zeta v2.0 instead... you'll get a Mega Beam Launcher and an action base with extra RM15 - RM20 ;)
Fin ;)


Awesome review man...how do you sand it without leaving scratches if you are not into painting?
ReplyDeleteUsually, sanding is the preparation for painting :) you might want to explore the use of polishing compound if you want to sand without painting :)
ReplyDeleteBy the way, I did not do any sanding for this kit ;)
i guess u need a very sharp side cutter n knife to clean the nubs. white parts are ok, but this kit is all grey :P
ReplyDeleteSorry, I thought you sand the kit by this statement on Part 4, "you need to handle the parts with a little more care as there are quite some thin parts which you might break during trimming of nub marks and sanding".
ReplyDeleteYep, that's what I've been doing, using knife to clear the nub marks but I still find it unsatisfactory. I guess you need a very sharp blade, what type of knife do you guys use? Like Alvin said, the color do give me some shivers in terms of nub marks, but you did ok especially on the wing part
Most nub marks are not obvious for this kit :) I usually uses penknife for trimming and there are a lot of selection in the market... just get one that fits your hand and make sure you change the blade when it gets blunt ;)
ReplyDeleteThis is what I'm using from my local bookstore...
http://www.facebook.com/photo.php?fbid=10150297611043253&set=a.365899743252.152529.626753252
For me, patience is the key.