Hi guys, long time :) I have been busy with work lately and have not been able to do much the last 2 months. Here's the latest bootleg PG, and the 1st from Daban, PG Strike Freedom.
Manufacturer: Daban
Scale: 1/60
Grade: PG
Origin: Gundam SEED Destiny
Price: RM300 (Contact me at duelmasterng@yahoo.com for latest pricing and availability)
Let's get started ;)
Section 1: Runners
The detailing are very nicely done, which I would say this is close to 95% of the original ;) The plastic quality is the also very nicely done instead of the regular glossy finish of Daban.
The only disappointment, and the main cause of this kit not getting my 99% is on some of the sparkling gold parts... the coloring is not even between the left and right parts. Good thing tho, this coloring issue is not really obvious after the armor are attached.
Section 2: Premium
This is a pleasant surprise that Daban actually throw in the diecast metal connector for the wings to resolve the easy-breaking of the same parts in plastic ;)
Section 3: Decals
This kit comes with a dry-sticker decals, and a piece of gold colored sticker for the dragoon system. The quality of dry-stickers are excellent but the cutting is a little off. Not an issue but it is a bit of nuisance :(
Section 4: The Feet
No particular reason to separate the feet from the leg :P
Snap-fitting is excellent.
Section 5: The Legs
The inner frame is pretty solid with good articulations same as the original :) Parts separations are nicely done and articulations are nicely done too.
The legs are pretty awesome without snap-fitting issue.
Section 6: The Waist Unit
The waist unit is neat and practical. The groin joint could be shifted up and down to provide better articulations. All 4 pieces of front and back skirt armors are individually moveable ;)
Section 7: The "XIPHIAS 3" Rail Cannons
This is the upgraded version of cannons that mounted as the side skirt. Nicely done with the moving mechanism without any issue snap-fitting.
Section 8: The Lower Body
Fitting all the parts I have built so far and we have the lower body. I found that the hip joint are a bit loose, allowing the legs to be detached with ease. A simple way to go around this would be the use of double-sided tapes when necessary ;)
The proportion is very nice and all moving mechanism works perfectly.
Section 9: The Chest and Abdomen Unit
The parts separations are pretty awesome. There are actually a joint between the chest and the abs which allow certain degree of tilting.
Just take note that the polycap part to connect the chest and abs could be a little tight so you would have to "use the force" when connecting the two... I would advise that you connect the 2 parts at the inner-frame stage instead of following the instruction manual to avoid accidental damage of the outer armor.
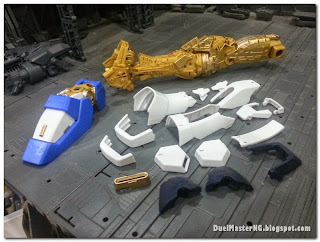
Section 10: The Arm Units
I love those arms!
The Shield Generator - It is absolutely normal for the pull-out mechanism to go all the way into the hollow space of the forearm when they are not deployed.
The fingers, since you need to assemble each segment, please pay close attention to the instruction manual on the placement... these parts are quite fragile and might break when you try to separate them upon wrong assembly.
Section 11: The Shoulder Units
Pretty straight forward for a PG. Nicely done and fitted well.
Section 12: The Backpack, without the Dragoon System
Another straight forward piece :)
Section 13: The Head Unit
Awesome parts separations. Instead of the usual wiring for LED, Bandai have adopted the standard LED unit and Daban replicated that. This makes it a lot more easier assembling and also changing battery ;)
I do not know about Bandai, but this Daban version comes with 2 LED unit with batteries. The only small disappointment is the GREEN light instead of the YELLOW light that Strike Freedom is supposed to emit from the sensors.
Section 14: Strike Freedom, without the Dragoon System
The Dragoon System would be pretty boring, and due to my day job, I don't think I can get them done any time soon so I decided to do a quick review up to this stage ;)
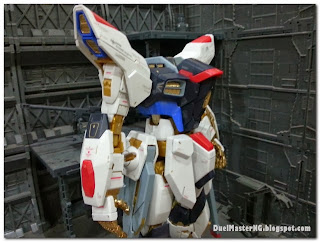
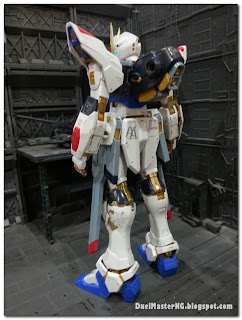
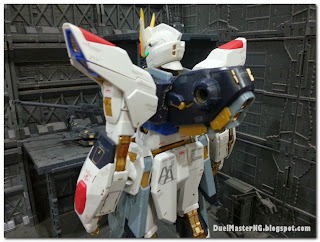
Let's enjoy some pictures of the main mecha with decals applied and gloss top-coat.
Quick Review
Plastic Quality and Detailing
Detailing for this kit is very nice done. If only looking at detailing, I would give a 99% compare to the original.
A little disappointment is on the coloration of the sparkling gold parts... the color are not evenly distributed so some left and right parts are actually at different tone. This is pretty obvious if you are seeing it in inner-frame but most of them are not really showing after applying the outer armor. And with this flaw, I reduce the scoring to 95%
As for the plastic, the quality is more superior compare to the usual Daban MG kits :)
Decals are pretty nicely done too, but the cutting is a little off.
Articulations
Articulations are pretty good, credit to Bandai.
- Head/Neck: Good.
- Shoulder: Very good.
- Arm/Elbow: Very Good.
- Wrist: Good.
- Hand: Excellent!
- Waist: Normal.
- Skirt Armour: Excellent! All 4 skirt armors are individually moveable.
- Hip/Tight: Excellent! Just a little bit loose.
- Knee: Excellent!
- Ankle: Good.
- Feet: Good.
Looks and Feels
Daban has done a great job replicating this. Like I mentioned above, a 99% score lowered to 95% due to some inconsistency of color for the sparkling gold parts. Other than that, all good ;)
The decals are also nicely done with a small flaw in the cutting but are still good and I used them as you can see from the pictures. The snap-fit is very nicely done as I do not have any issue at all snap-fitting the whole kit. The articulations are pretty awesome too.
I am not sure if the original would have the following issues but I think they worth mentioning: -
- The hip joint are a bit loose, allowing the legs to be detached with ease. Workaround: Wrap a layer of double-sided tapes onto the peg when necessary ;)
- The polycap part to connect the chest and abs could be a little tight so you would have to "use the force" when connecting the two. Advise: Connect the 2 parts at the inner-frame stage instead of following the instruction manual to avoid accidental damage of the outer armor ;)
... well, this is not end yet... I'll be back :P
To be continued ;)


